How to record your screen and your face on a Mac
The free way: open QuickTime Player, choose File, New Movie Recording, then View, Float on Top, so the camera window stays above everything. Then record the screen with Shift-Command-5. The camera window becomes part of the picture, so put it where you want it before you start, because you cannot move it afterwards. A recorder that keeps the camera as its own file, such as Take, lets you turn the bubble on or off and drag it to another corner after you stop.
Last updated: October 2026
Written by the developer of Take, a Mac screen recorder, on 6 October 2026. The QuickTime steps and Take's switches were tried on a 16-inch MacBook Pro (Mac16,7) on macOS 27.0.1. We did not film a face for this page, so the pictures show the controls rather than a bubble with someone in it. Presenter Overlay is described from Apple's support page and was not tested with a recording.
Free: QuickTime's camera window and Shift-Command-5
- Open QuickTime Player and choose File, New Movie Recording. The camera turns on in a window.
- Click that window, then choose View, Float on Top. On our Mac the item stayed grey until QuickTime was the app in front.
- Drag the window into a corner and make it smaller. The smallest it would go on our Mac was 427 by 240 points.
- Press Shift-Command-5, choose what to record, and under Options pick your microphone, and Include System Audio if you want the Mac's sound.
- Click Record. Stop from the menu bar, then close the camera window. Nothing is saved from QuickTime unless you press its own record button.
What this costs: the camera is a rectangle, not a circle, it covers part of what you record, and it is baked into the video. If it ends up over the button you meant to show, the only fix is to record again.
Presenter Overlay is for calls
Presenter Overlay puts you on top of the screen you share, either large beside it or small in a movable bubble. Apple's support page says it needs macOS 14 or later on a Mac with Apple silicon, and you choose it from the screen-sharing menu in the menu bar while sharing your screen in a video call, in FaceTime or another app such as Zoom. It is made for calls, not for a recording on its own, and we did not test it with a screen recording on macOS 27.
With Take: the camera as its own file
- Click Take in the menu bar, or Record in Take's window.
- Switch Camera on. Click the camera's name to pick another one.
- Pick Screen, Window or Area, and click Record.

Take's record panel with the camera switched on. Click a device's name to pick another one.
While you record, a round preview of your face sits in the bottom-left corner of the screen with the words Recorded on its own. Take keeps that preview out of the recording and saves the camera to its own file beside the take. When you stop, the Look panel's Camera bubble switch puts it on the video, and you drag the bubble to the corner you want. Change your mind later and drag it again.
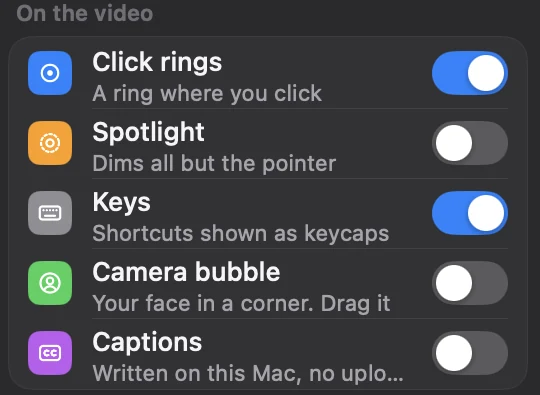
After you stop: the Camera bubble switch in the Look panel. Our test take had no camera in it, so the switch is off.
The camera stays off until you switch it on. Everything is recorded and edited on your Mac.
Download Take to try it. Recording and editing are free to try · the 7-day trial starts when you first share · macOS 14 or later
Which way to pick
| Way | Cost | Move the camera after | Tried here |
|---|---|---|---|
| QuickTime and Shift-Command-5 | Free, built in | No, it is part of the picture | Yes |
| Presenter Overlay | Free, built in | Only during the call | No |
| OBS Studio | Free | No, you lay it out before you record | No |
| Take | $24.99 once, with Crest and Minutes | Yes, drag it to any corner | Yes, without a face |
FAQ
How do I record my screen and my face at the same time on a Mac?
Open QuickTime Player, choose File, New Movie Recording, then View, Float on Top, and record the screen with Shift-Command-5. Or use a recorder with a camera bubble, such as Take, which records the camera as a separate file you place after.
Can QuickTime record the screen and the webcam together?
Not in one recording. Float QuickTime's camera window over your screen and record the screen with Shift-Command-5: the camera window is captured as part of the screen.
Can I move the camera bubble after recording?
Not with the QuickTime method, because the camera window is part of the picture. In Take you can turn the bubble on or off and drag it to another corner after you stop.
Does Presenter Overlay work when recording my screen?
Apple describes it for sharing your screen in a video call, from the screen-sharing menu. We did not test it with a screen recording on macOS 27.
Can I use my iPhone as the camera?
Yes, with Apple's Continuity Camera an iPhone shows up as a camera on the Mac, and on our test Mac it was in the system's list of cameras. In Take you pick it by clicking the camera's name in the record panel.
Recordings that arrive finished
Stop the capture and it is already staged: zooms where you clicked, dead air sped up, a real backdrop, and a plain .mov you own. Comes with Crest: $24.99 once for Crest Pro, Take and Minutes.
Get Take with Crest, $24.99 Try free for 7 daysmacOS 14 or later · Universal · no watermark, ever · 7-day trial, no card up front
Keep reading: Screen record with internal audio · Record a webinar · Record a call · No watermark, no time limit · Best Mac screen recorders · Take overview