How to trim, cut, crop or speed up a screen recording on a Mac
To trim, select the recording in Finder, press Space and click the Trim button, or open it in QuickTime Player and choose Edit, Trim. To cut a piece out of the middle, use QuickTime's View, Show Clips, then Edit, Split Clip, and delete the piece. Neither tool can crop or speed up a video: Photos can crop, iMovie can do both, or record only the part of the screen you need in the first place.
Last updated: October 2026
Written by the developer of Take, a Mac screen recorder, on 7 October 2026. Every built-in step on this page was tried on a 16-inch MacBook Pro (Mac16,7) on macOS 27.0.1, recording a window of sample text, and every test file was deleted afterwards. iMovie and Photos were not opened: iMovie would have opened the owner's own library, and editing a video in Photos means importing it into a Photos library. What this page says about them comes from Apple's guides, read the same day.
Trim in Finder: the quickest way
- Select the recording in Finder and press Space. Quick Look opens it.
- Click the Trim button at the top of the window.
- Drag the yellow ends to where the video should start and stop, then click Done.
- Choose New Clip to keep the original and save the trimmed copy, or Replace to overwrite it.
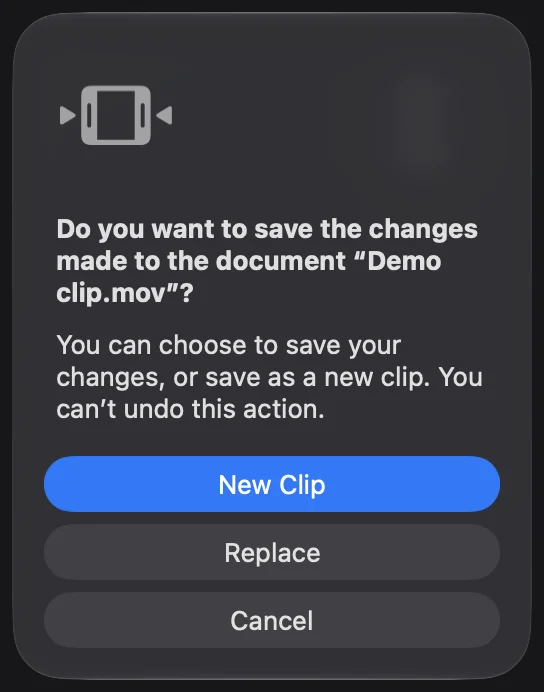
After Trim and Done in Quick Look. New Clip keeps the original; Replace overwrites it.
On our test, an 18 second recording trimmed to 12.5 seconds was saved as a new clip in about 3 seconds, at the same 1312 by 844 size. Replace cannot be undone, so pick New Clip if you are unsure.
Trim in QuickTime Player
- Open the recording in QuickTime Player and choose Edit, Trim, or press Command-T.
- Drag the yellow ends, then click Trim.
- Choose File, Export As and pick a size, or File, Save.
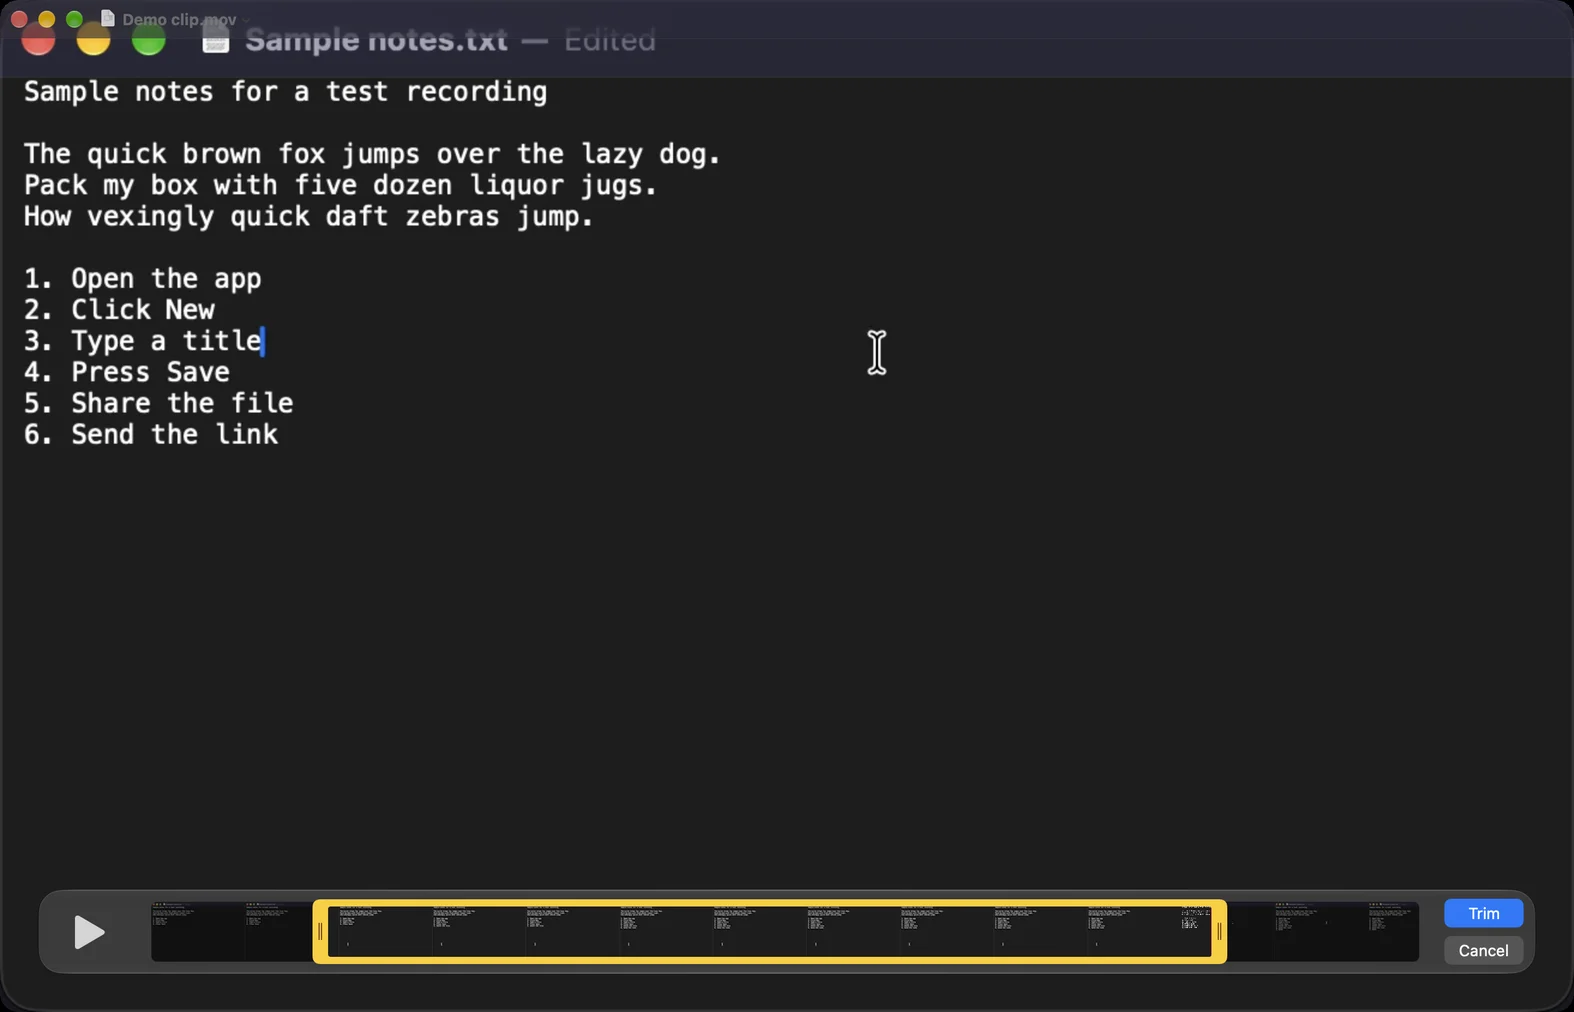
QuickTime Player, Edit, Trim. Drag the yellow ends, then click Trim.
After Trim, QuickTime treats the result as a new document and leaves the original file alone. When we closed it, QuickTime asked whether to keep the new document. Export As offered 1080p, 720p and 480p for our recording. 4K was greyed out because the recording was smaller than that.
Cut a piece out of the middle
- In QuickTime Player, choose View, Show Clips, or press Command-E.
- Move the playhead to where the unwanted part starts and choose Edit, Split Clip, or press Command-Y. Do it again where it ends.
- Select the piece in the middle and press Delete. Then click Done and save.

View, Show Clips, then Edit, Split Clip twice: three clips. Select one and press Delete to cut it out.
We split our test recording into three clips. Apple's QuickTime guide covers the last step: select a clip and delete it, or drag clips to rearrange them.
Crop: not in QuickTime
QuickTime's Edit menu on macOS 27 has Rotate and Flip, but no Crop, and Quick Look only rotates. The options:
- Record less. In Shift-Command-5, choose Record Selected Portion and drag a frame around what you need. Nothing to crop later.
- Photos. Apple's guide says Photos can trim, crop and straighten a video. The video has to be in your Photos library first. Not tested here.
- iMovie. Free from Apple. Select the clip, click the Cropping button, then Crop to Fill. Apple's guide says the frame is fixed to 16:9. Not tested here.
Speed up: not in QuickTime either
QuickTime's View, Playback Speed only changes how fast it plays on your screen, not the file. iMovie can: select the clip, click the Speed button, choose Fast, which Apple's guide says is twice normal speed, or set a custom speed. We did not check whether Photos can speed up a normal video.
With Take
Take does the usual edits when you stop. It trims the start and your reach for Stop, speeds up the pauses where nothing moves, and zooms in where you clicked. Then everything is on one strip: drag the yellow ends to trim, and Cut splits the take at the playhead into clips you can drag or delete. Command-Z undoes any step.

Our test take in Take. Cut split it at the playhead; the selected pause can play 2, 4 or 8 times faster, or at full speed.
Our test take of the same sample text read: Recorded 17.8 s, plays in 6.8 s, 2 zooms, dead air 4× faster, saves 9.4 s, ends trimmed 1.6 s. Each pause can play 2, 4 or 8 times faster, or at full speed. Take speeds up pauses, not the whole video. It has no crop tool either: pick Window or Area when you record, or the vertical or square shape in the Look panel. The Share sheet showed 720p at about 4.5 MB, and the saved file was 3.9 MB, written in about 5 seconds.
One limit to know: Take edits the takes it recorded. It does not open a recording made with another app.
Download Take to try it. Recording and editing are free to try · the 7-day trial starts when you first share · macOS 14 or later
Which tool does what
| Tool | Trim | Cut the middle | Crop | Speed up | Tried here |
|---|---|---|---|---|---|
| Finder, Quick Look | Yes | No | No | No | Yes |
| QuickTime Player | Yes | Yes, Split Clip | No | No | Yes |
| Photos | Yes | Not checked | Yes | Not checked | No |
| iMovie | Yes | Yes | Yes, 16:9 | Yes | No |
| Take | Yes, done for you | Yes, Cut | No, choose the area or shape | Pauses only | Yes |
FAQ
How do I trim a screen recording on a Mac?
Select it in Finder, press Space, click the Trim button, drag the yellow ends and click Done, then New Clip. Or open it in QuickTime Player and choose Edit, Trim.
How do I cut out the middle of a screen recording?
In QuickTime Player, choose View, Show Clips, split at the start and end of the part you do not want with Edit, Split Clip, then select that piece and delete it.
How do I crop a screen recording on a Mac?
QuickTime cannot. Photos and iMovie can crop a video, and iMovie's crop is fixed to 16:9. The easiest way is to record only the part you need with Record Selected Portion in Shift-Command-5.
How do I speed up a screen recording on a Mac?
QuickTime's playback speed does not change the file. iMovie's Speed button does. Take speeds up only the pauses where nothing moves, 2, 4 or 8 times.
Does trimming in Quick Look change the original?
Only if you choose Replace. New Clip saves a trimmed copy and leaves the original as it was.
Recordings that arrive finished
Stop the capture and it is already staged: zooms where you clicked, dead air sped up, a real backdrop, and a plain .mov you own. Comes with Crest: $24.99 once for Crest Pro, Take and Minutes.
Get Take with Crest, $24.99 Try free for 7 daysmacOS 14 or later · Universal · no watermark, ever · 7-day trial, no card up front
Keep reading: Screen recording not working · Stop a screen recording · Where recordings go · Record with internal audio · Best Mac screen recorders · Take overview